Posing In The 70's
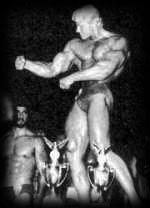
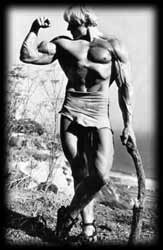
 Working on photo projects with photographers Russ Warner, Jimmy Caruso and Artie Zeller, with Joe Weider directing the poses, I learned posing technique. We'd often spend 20 minutes perfecting the pose for a single photograph. I left competition after winning the Mr. World in 1970, but from the back row I watched the evolution to today's body sculpture and artistic display.
Posing wasn't as important then as it is now. Today, where there's often a fine line between first and third place, your posing routine is the key that can set you apart from the rest of the lineup.
Consider your posing to be a third of your contest preparation, right in there with training and diet. And just as you'd alter your diet to fit your needs to each show, consider a change in your routine and in your music. In many cases the judging panel will be the same from one regional show to the next, and they'll recognize and be bored with repetitious routines.
On the following pages I'll be presenting a few thoughts on exactly how to design a posing routine. Make the effort of creating your own original posing display, and the audience will be gifted with a reflection of your personality.
Refer To Magazines
 Paging through magazines, choose ten or twelve of your favorite poses. Select poses that you are impressed with or inspired by, evaluating your body at the same time. Does the pose look super with Bob Paris's symmetry, but silly on your body type? Cut out the pictures as you decide so that you'll have them available to imitate later.
Select music that will activate and excite the crowd. Your posing style will be dictated by the music, either elegant or aggressive depending on your selection. Your style of music is important. Your mood, the mood of the audience and the judges will be set moment by moment, heavily balance by the competitor's choices of music.
Clearly defined space in the music for major poses is usually extremely important. Some routines flow perfectly and gracefully through music without accentuating beats, but you can be confident that only a few competitors in a hundred can successfully achieve the beauty and grace of such a performance. If you don't have a childhood background in dance or ballet, or you don't have a nearly perfect body with matching symmetry, try to select music with a pronounced beat where you can clearly put your strongest poses.
Be Yourself
Based on your personal style and on the music you've chosen, decide if you want to have the music lead in or if you want to begin and hit the first powerful pose immediately. If you chose the lead-in, do you also want to have 1-3 beginning poses before hitting the first strong pose?
After you've made these decisions, make a tape of 90 seconds of your posing music. Use the lead-in, if any, and use a stopwatch to make an official posing tape. Then advance the tape about 60 seconds and make another 90-second posing spot. Repeat the 60-second break and music sequence ten times on the same tape so that you'll have a long practice tape.
Listen to the music closely, with a tablet handy, and find the 10 or 12 spots in the music that will contain the most powerful poses you've chosen. Take this time to close your eyes and visualize your time in the spotlight. Imagine your trip to the contest, the weigh-in, and your time backstage. See yourself walk on stage, hear your music begin and feel the crowd react to the pulsing beat. Get a complete sensation of the music before you begin to design the routine.
Choose Then Act
On paper, using stick-men drawings, decide how you want to begin the routine (coming onstage or already onstage, from the front, from the back, from either side, kneeling, etc.). Then select your first powerful pose. Will you need lead-in poses before you get to the beat that presents the first pose? If you've decided to lead with flowing movements before your first main pose, calculate how much time you have, measured by the music, and select your first lead-in poses.
Next, select the second major pose and count the number of seconds from the first pose to the second pose, measured by the music. Be sure to leave 3-5 full seconds to hold each of your strong poses. 
The remaining time in seconds will guide you through your transitional poses. Do you have five seconds to fill before you must be in position for the second major show pose? What goes into each transition calculation is the time available and the distance to be traveled. For example, if you've decided to begin your strong poses with a front pose and to continue with a strong back pose, your transitional poses from front to back will be dictated by the time allowed by the music. If you have only two seconds, you'll probably have no formed transitional poses but will instead flow from front to back, either elegantly or aggressively, depending upon both your style and the style of the music.
Subsequent poses should be calculated in the same manner, both major and transitional. During your free posing, show only your most massive and symmetrical bodyparts; if you have any weaknesses, don't let the audience or the judges see them. Use your free posing to display the results of the combination of your mind and body - your nutritional program, the workout you've designed for yourself and your bodily efforts in the gym each day.
After you've scribbled your stick poses on paper, walk through the routine to see if your imagined moves are possible. Turn on the music and slowly, with the music racing ahead of you, move through the routine again. Did you miscalculate any of the transition times? Do you suspect that when up to tempo you'll have gaps or hustles from front to back or side to opposite side? If you find glaring mistakes, add or delete transitional poses to take up or create slack. When you feel comfortable with your plan, move through the routine more smoothly, not posing, but up to tempo.
Practice, Practice, Practice...
The next step is to practice the actual poses, and if you don't pose year-round, you'll have to work into this. Posing is exhausting, and, for most of us, emotionally and often physically harder than the workouts that lead to the posing dais. Take your time on this. Beginning at 10-15 minutes a day, go through your newly designed routine several times without music, and add a final run with the music.
You will have ironed out the kinks long before this, so spend your last weeks practicing the following techniques of posing. Work on the individual poses, especially the 10 or 12 you've selected as your strongest. Set up a full-length mirror, or even two if you can. Select one or two poses to work on each day, and begin your efforts to perfect each one.
Go back to the magazines or photos you cut out. Study the poses and consider how you'll imitate them. Exactly where are the feet pointing? Are the legs angled in any direction? Are the hips thrust? Are the arms held evenly? Is the chin held up proudly, or down, pensively?
After you have completely studied the poser and can feel every element of the poser's body, test the pose visually in your imagination. Is it possible that the pose would be better with the knee pointing outward another fraction? Would you personally prefer (or would your music dictate) a different thrust to the chin or to the hips? Transfer these elements into your routine, but remember that any changes must complement the poses. The routine must continue to be your own and not that of a mentor.
As you adapt each pose, study it carefully in the mirrors. It's extremely difficult to get complete answers from a mirror, especially from the back, and the mirror tends to flatten (and fatten) a muscular body. If you can tolerate it, put on your posing suit and ask you training partner for an opinion. It'll be a difficult half-hour, since you probably will hold an extra 5-10 pounds of fat and most likely will have no planned color on your skin, but a knowledgeable opinion is invaluable.
Take Pictures
It's wise to have a roll of snapshots taken, showing each pose of your routine. Don't expect miracles - physique photography takes years to learn proficiently and your training partner most likely won't be skilled in this. Instead, look for flaws in your posing. Are you forgetting to turn your face to the side during the back lat spread? Analyze the photos, learn from them, practice the corrections, and move on.
Practice the routine to the music several times a week. You don't want to become bored with the music or the routine, but the movements must be second nature to you. In your excitement on the posing platform, any forgetful hesitation will be magnified.
Expect The Unexpected
Don't expect to use your music during the prejudging session, since it's generally not allowed. Often an awe-inspiring musical posing routine will look silly on the silent stage, so consider a second routine. The judges will be looking for muscle size and body symmetry and for an athletic look and flow from pose to pose.

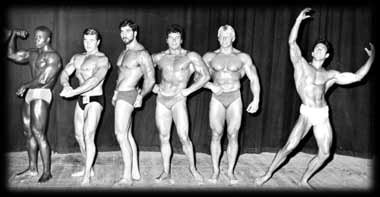
Bodybuilding contest photo from the Joe Weider archives.
I'm not suggesting a stoic, boring 60 seconds, but I am telling you to stop and visualize the prejudging. Create a routine to excite a crowd silently and you'll be remembered.
Keep it short, 60 seconds or less, and don't continue to pose after the head judge calls "time." If you're not finished, quickly move to your final pose, smile, and head offstage.
Enjoy The Excitement
Once you have your two routines designed, comfortable, and fine-tuned, you're ready. And if you're ready, you can go to the show with confidence and enjoy the excitement. The apprehension is gone and the wholesome and hearty enthusiasm of the event is upon you. Your competitive energy begins to mount and if you've prepared your body as well as your routine, you'll know it, and so will the audience and judges.
Posing in the 80's has brought another dimension to the artform of bodybuilding, a new purpose, thoughtfulness and self-expression. Aside from the competition and the trophies, it's entertainment for the eager audiences. It's showtime - see you onstage from my back-row seat!
Bombs Away,
